Simplified Digital Photography for Museum Work
By Stephen D. Gaimari
Presented to the 5th International Congress of Dipterology Brisbane, Australia, 2 October 2002
The recent availability of high-resolution digital cameras at relatively modest prices provides the dipterist with a new tool that simplifies successful photography. We use the example of the Nikon Coolpix 990/ 995 series of digital cameras to demonstrate simple, practical techniques for photographing fly specimens in the museum environment. This is an inexpensive method for producing good digital photos of flies through the eyepiece of a stereo (or compound) microscope. Specialized equipment is minimal - the main item being the camera - so these methods are convenient and adaptable for use while traveling to museums to examine types and other specimens. A simple homemade collar is discussed. Large numbers of photographs can be taken in a very short period of time.
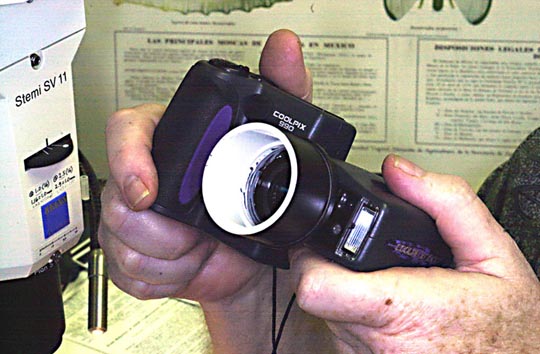
We make use of a plastic collar that is glued to two different step-up rings: a 28mm ring on top that fits the standard Coolpix lens, and a larger ring below that attaches to the collar rim.
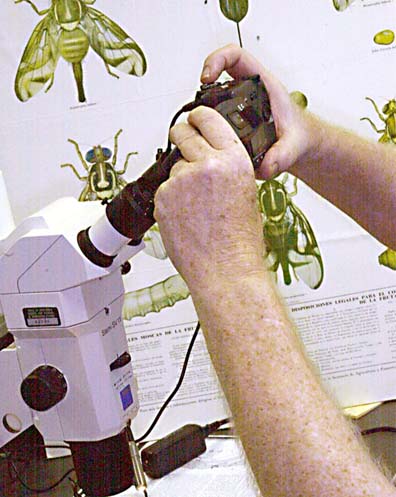
The collar, which is used to position the camera over the eyepiece, helps to center, align and hold the camera in place during photography. Our technique is easy to use and enables one to quickly take photos with minimum disruption during microscopic study of fly specimens. This system allows the user to hand hold the Coolpix, so no time is wasted attaching an adapter clamp to the eyepiece, or replacing the eyepiece with one that is attached to the camera lens - which are common methods used by other adapter systems. Using standard Coolpix camera settings (described below) you can get reasonably good depth-of-field and avoid blurred images, as the lightweight camera and adapter rest on the eyepiece while taking photos. We recommend the standard 150-watt fiber optic light (either using 2 or more flexible arms or a ring light) as a good light source. However, the beauty of a digital camera is that nearly any available microscope light source can be made to work.
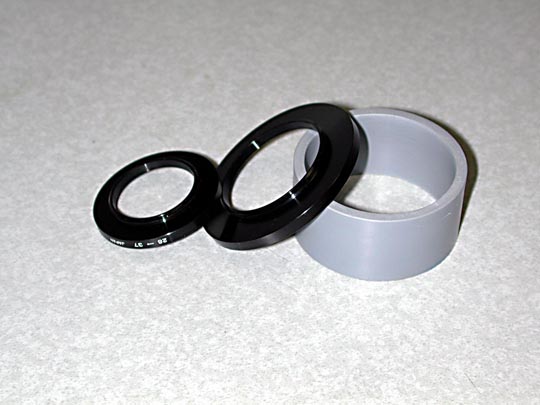
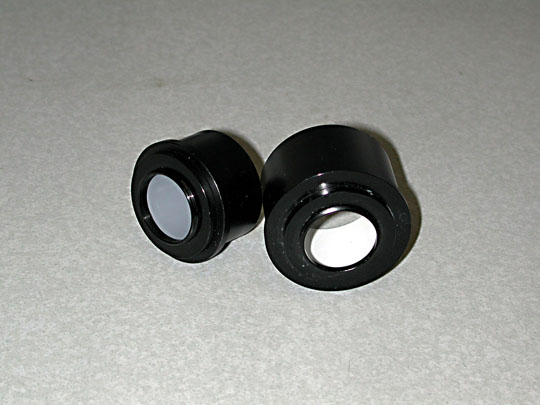
We generally can use either of two sizes of collars, and one or the other will fit most eyepieces: a large one of 42mm internal diameter, or a smaller one of around 33mm diameter. These items are easily fashioned from PVC plastic fittings, which can be found in most hardware stores. (The white plastic is a type used for water pipe and the gray for electrical conduits.)

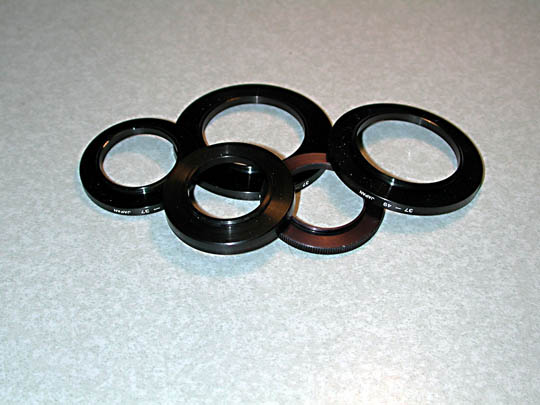
For step-up rings, we need a 28 to 37mm ring, which attaches to the threads of the Coolpix lens; and a second ring, a 37 to either 45mm (for a smaller collar), or to 49 or 52mm (the diameter depending on the type of plastic fitting selected), for the larger collar. The plastic fitting is sawed off to leave a cylinder of around 25 to 30mm depth, which is then glued to the larger ring with slow-drying epoxy. When completed, the larger ring should fit right on top of the eyepiece, so the camera lens and eyepiece lens are positioned close together (within 5mm); this gives the best field-of-view.
Coolpix Settings
The following Coolpix settings have produced good results for our microscope photography; the terminology is for the 990 model and is adapted from the instruction manual for that camera. The same general methods work for the 995 and newer models, but the terminology may be slightly different for each specific camera type; consult your manuals for details (click the links for good web-based user's guides for both the 990 and the 995).
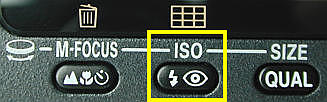
On the control panel of the camera, there are several things to set.
Focus Mode
The focus mode button should be in the "neutral" position (that is, not set on macro or infinity).
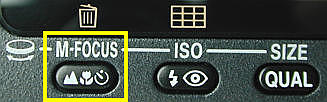
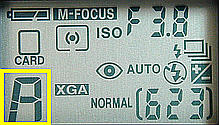
By depressing the M-Focus button, the upper right-hand icon ("close-up icon" here) will change from one mode to the other, through "close-up" (the flower, second from left), "infinity" (the mountains, right), and "neutral" (no icon).


Advanced Photography Mode
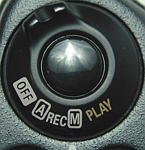
The mode dial should be set to M-Rec mode (which is termed "advanced photography" by Nikon). On the M-Rec menu, select these options under the following sub-menus:
Exposure Mode
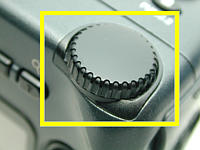
Select A setting (Aperture-Priority Auto). Press the mode button and turn the command dial (while the button is depressed); A appears in lower left of LCD monitor (default is P). Always keep the largest F-number selected (by turning the command dial, when in A mode), for greatest depth-of-field.
The following require that you first push the "Menu" button twice to access the "User Settings" menu.
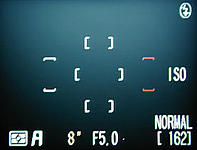
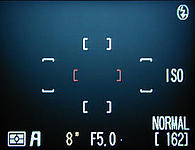
Focus Area Selection
Select A setting (Aperture-Priority Auto). Press the mode button and turn the command dial (while the button is depressed); A appears in lower left of LCD monitor (default is P). Always keep the largest F-number selected (by turning the command dial, when in A mode), for greatest depth-of-field.
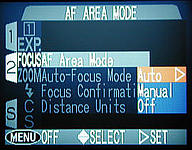
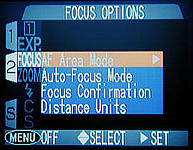
One of five spots (within red bracketed area) is selected with multi selector; this is the spot that will have the sharpest focus. Notes: In the lower left, the mode is A (Aperture-Priority Auto); in the upper right, there is no "infinity" or "close-up" symbol for focus mode (so it is in "neutral"); and in the lower middle, the F-number is 5.0 (to maximize the F-number, turn the command dial right).
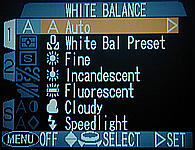
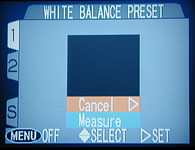
White Balance
Select White Balance Preset in White Balance submenu. Use Measure option in Preset sub-menu; place white (or light gray) piece of paper in center of LCD monitor with light source on, then press the multi selector on the right for several seconds, until beep is heard, which indicates that White Balance is set.
All other Coolpix settings can be left on default. Our suggested "eyepiece photography settings" will be retained in the Coolpix memory as long as the batteries supply power. During microscope photography, we use the Coolpix AC adapter to provide power, as this greatly extends battery life.
Camera Use

When shooting pictures with this technique, a little practice is needed at first, to properly align the camera lens to the light path from the scope through the eyepiece. This is done by watching the LCD screen, and holding the shutter-release button in a half-depressed position and moving the camera until the light and image are centered. When the image is clear of vignetting (seen right, arc-shaped shadows at the edges), the camera is properly aligned. Holding the camera still, repeat the process, and then fully depress the shutter; with practice, this becomes a very routine procedure.
If the collar fits too loosely over the eyepiece (is more than 2 mm larger in diameter that the eyepiece), you may want to tighten the fit (a 1mm gap is ideal). A sleeve (made from a strip of light cardboard, wrapped tightly around the eyepiece, and held into a cylindrical shape by tape on the outside of the cardboard) will be a useful addition. This allows you to rapidly position the collar on the eyepiece, and not waste time by having to make frequent alignment corrections. Problems with misalignment (seen left) can result in poor photos.
Eyepieces
Note that the kind of eyepiece influences the results of your digital image.
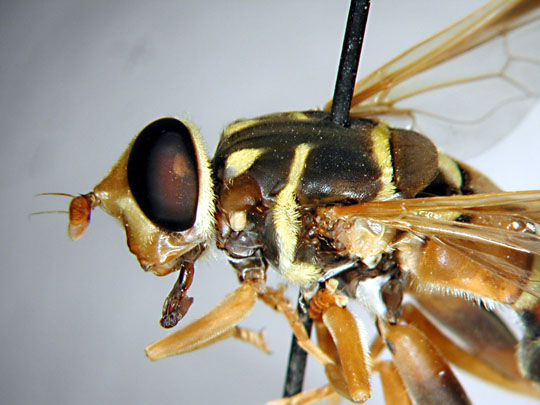
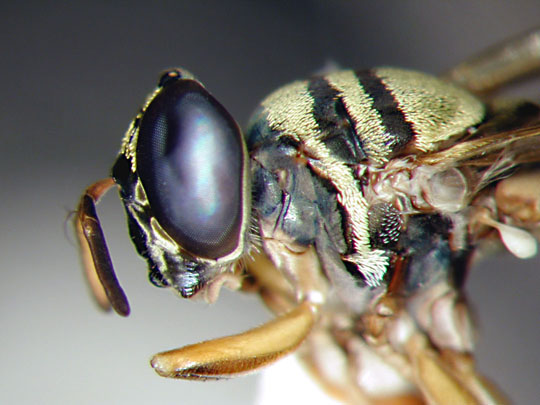
Eyepiece I
We have found that widefield eyepieces (10x/21 or greater numerical value) which are also high eyepoint (made for eyeglasses) give the best results. The image to the left is with 10x/25 eyepieces.
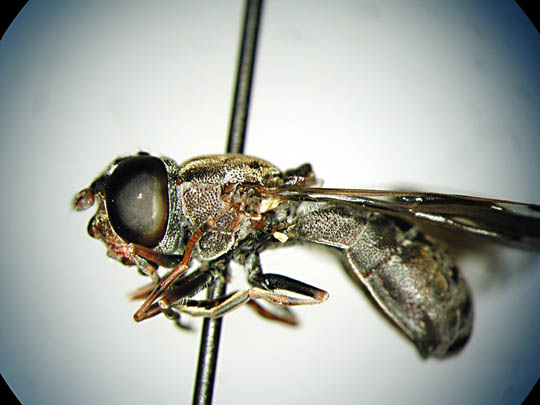
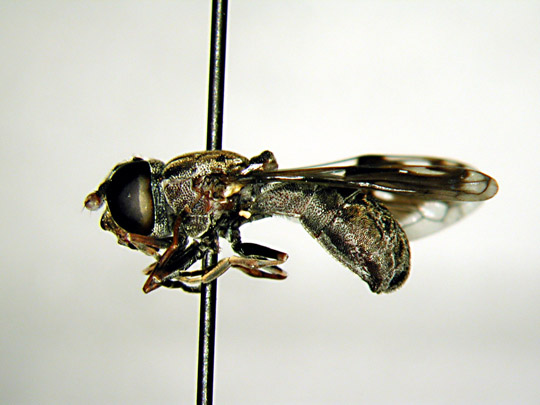
Eyepiece II
In general, narrower eyepieces, and those with low eyepoint, will yield a reduced field of view. The image to the left is with the same settings as above, but with 10x/18 eyepieces.
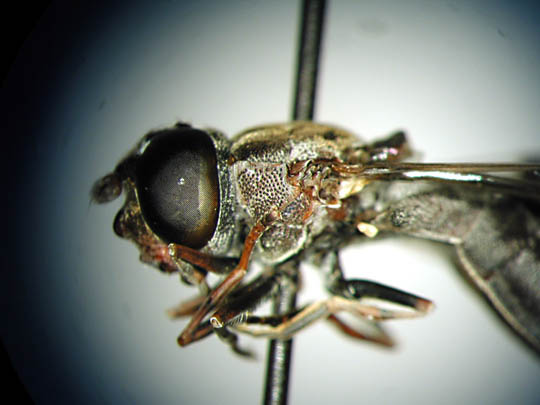
Eyepiece III
However, good images, with eyepieces of smaller fields of view, can be obtained by increasing the optical magnification in the Coolpix. (Do not bother with increases into the digital range, as this is "false" magnification). The image to the left is done with the same settings and eyepieces as above, but utilized Coolpix optical zoom. One practical solution to having appropriate eyepieces available for Coolpix work when traveling is to bring your own along with you, as most are interchangeable with other microscopes.
The most important factor in good microscopic photography is to make certain that the desired image is perfectly focused, because the camera will only be able to give you as good an image as you give it. An advantage of our collar technique is that it may be applied to the eyepiece without any interference to a correctly focused microscopic image.
Questions? Comments? Email Steve.
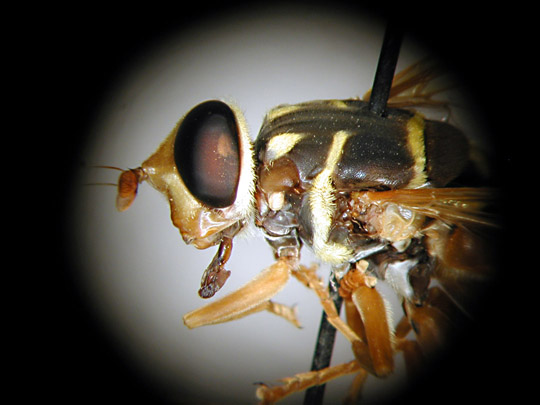
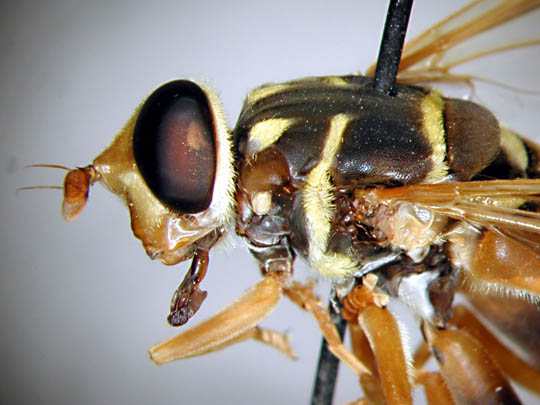
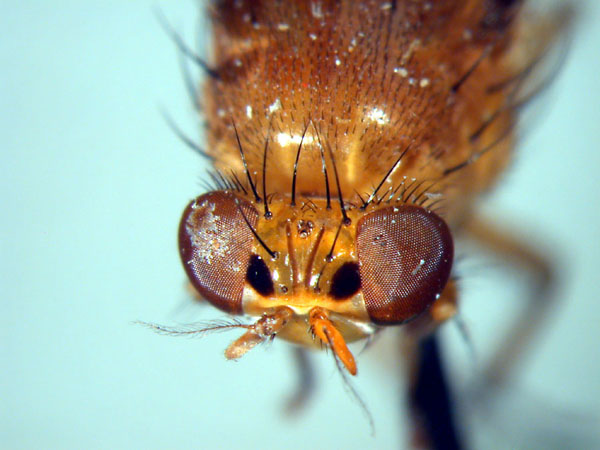
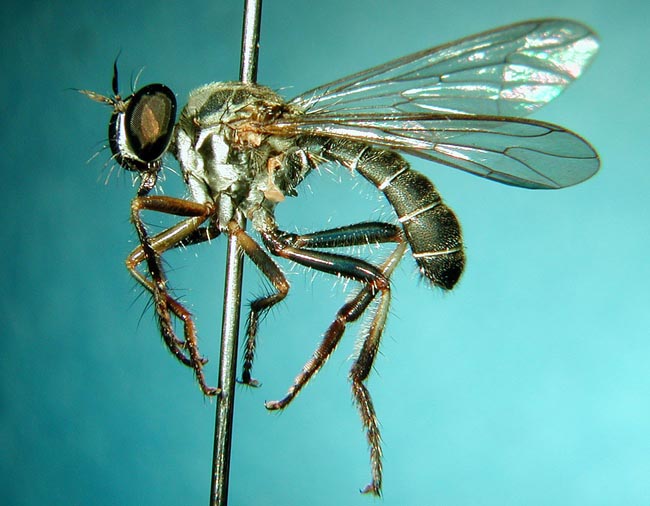
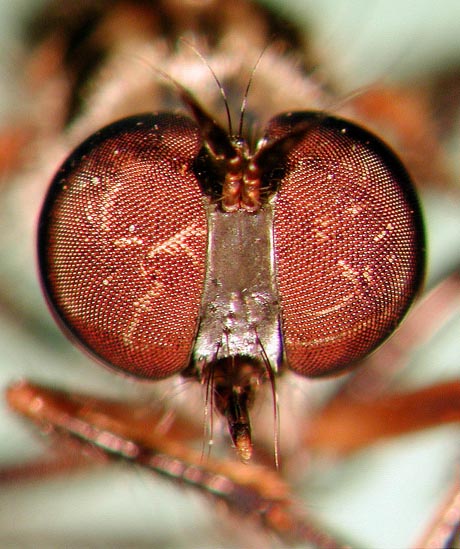
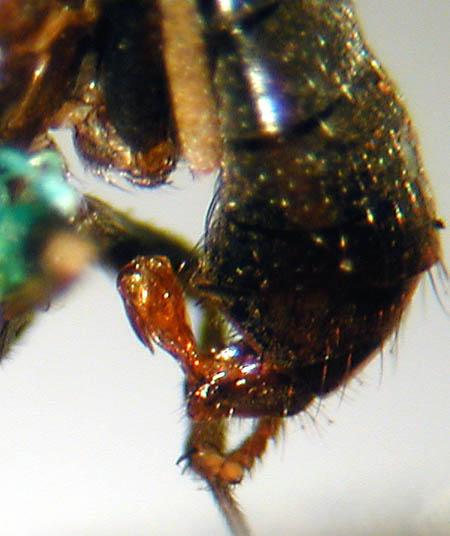
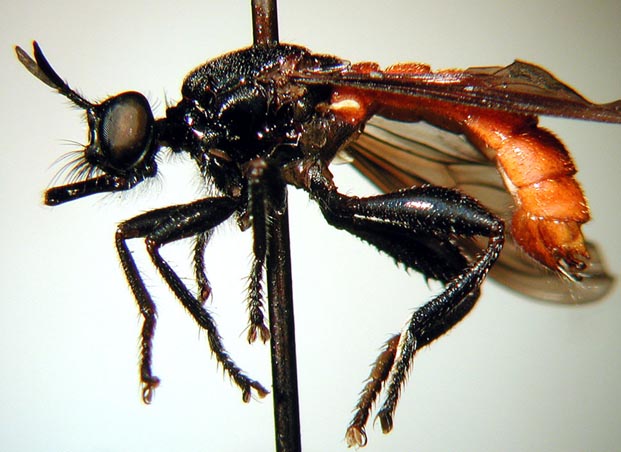
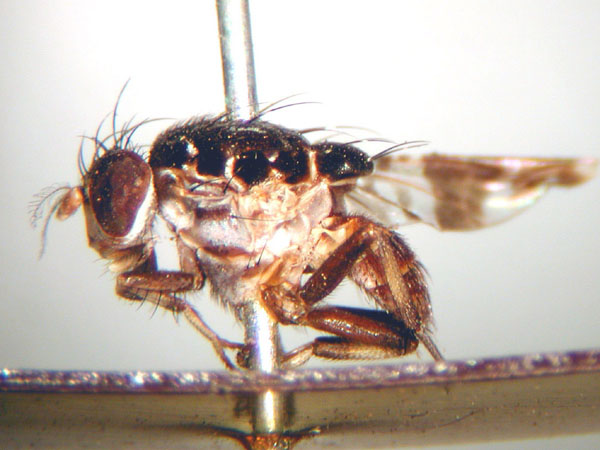
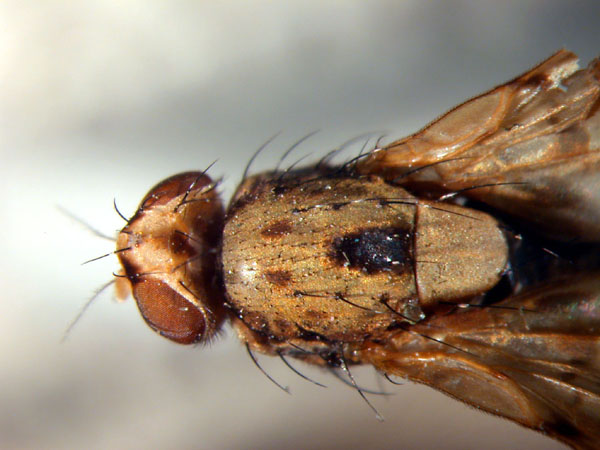
Here are some examples of our results:


A very good series of digital camera user's guides were done by Dr. Ching-Kuang Shene, Associate Professor of Computer Science at Michigan Technical University. Here are his user's guide pages for the CoolPix 995 and the user's guide pages 990. Also, we want to thank Dr. Shene for allowing us to use images from his website on this one.
Report a Pest
Entomology Sub-Menu
Plant Pest Diagnostics Center
CDFA Collections
General Info/Links
Contact Us
Plant Pest Diagnostics Center & Entomology Laboratory
3294 Meadowview Road
Sacramento, CA 95832
Phone: (916) 262-1100
Fax: (916) 262-1190
Map & Directions